Board racers
Toys to make for small children.
In the mid 1950s a local policeman was popular among parents as the entertainment at children’s parties. He was cheap, safe and slightly wonderful and few families had television so he went down a storm with his not very magic tricks. Top favourite was a wooden box with a sliding sun in it and painted wooden clouds at either end, the ‘magician’ would ask his young audience to shout when the sun came out and then tilt the box so the sun slid behind a cloud.
This simple mechanism, which was certainly not new last century, has resurfaced lately as Penny Sliders: greetings cards in which the weight of a concealed coin propels a card shape across the surface of the card picture.
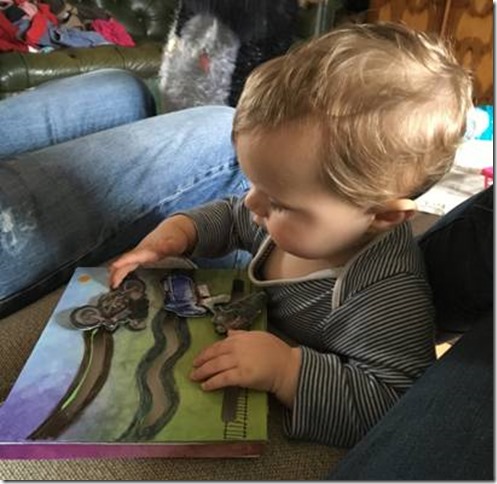
I have adapted this idea to produce the toys depicted for my grandchildren. These toys are made of cardboard and coins; whilst strong enough to be played with for years and safely without small loose parts, the entire toy is recyclable and will not end up, as so many toys do currently, as lumps of plastic waste clogging up the sea or landfill. Minimal skill is required, if you can cut cardboard and apply glue to it, you can make them, no artistic ability is needed either, you can buy the parts to make them look like mine and you can recycle cardboard you were going to throw away to make the free version. I made them for my grandson’s first birthday, but his big sister, who is two and a half, likes them too.
Tools and materials.
Cardboard. The board I used is one eighth of an inch, about 3mm thick. I used new board sold as ‘chipboard’ in arts and crafts supplies stores. It is solid board, if you are using recycled board avoid the kind with a hollow corrugated inner, it wouldn’t be strong enough.
Coloured cardboard for decoration. I used Adorable Scorable from Hunkydory. It is 300 GSM and has bendy ink technology, meaning the surface colour will not crack to show plain card when bent. Some of the vehicles are pictures cut from the Hunkydory Little Books. Use the best quality printed material you can find for decoration.
Cutting dies to make the sliding holes. I used the Penny Sliders package from Tattered Lace, which includes 9 slider holes, coin covers and shapes to make the things that will slide, the rocket is theirs. Elizabeth Craft Designs make Sliders and Spinners which are just the dies to cut four holes. I only used the dies as a marking guide, they are not deep enough to cut through the thick cardboard. You don’t need dies or a die cutting machine, you could make the holes yourself.
Strong glue. I used Aileen’s Thick Tacky glue, I also used the strongest double sided narrow construction sticky tape I could find. It’s usually sold as red liner tape because it comes on a red carrier tape.
Non-toxic water based varnish and colouring materials. The toy is too big for a small child to get into its mouth but some children will lick anything.
Big scissors.
Metal ruler.
Strong bladed craft knife.
Paper clips.
Coins or metal discs.
Begin by deciding the size, which may be decided for you if you have chosen to use the Tattered Lace or Elizabeth Craft sliding dies. If you are making the sliding holes yourself you could make them any length but if you make them longer than A4 paper size you may struggle to find coloured card to decorate. You need to leave sufficient solid board at the end of the slides so the board front is not weakened by the hole. You should design the size large enough to deter a child from eating the toy but not too big to hold. Please take notice of the child you are designing for, none of my instructions come with any kind of warranty, design professional agreement or any such thing. The world as it is today means that I have to say I cannot be responsible for you making something dangerously edible, or any toddler you know bashing their little sibling with it or poking their fingers in the slots, or taking it in the bath and making it all soggy or any of that stuff. Please do use your own good sense and knowledge of your child recipient.
Decide on the theme for your board. I made one board with land racing vehicles, all of which are from the Hunkydory Little Books, and the other with sky vehicles: one is the Tattered Lace rocket – the balloon and plane are pictures from food packaging. Your moving parts do not have to be vehicles, a printed photograph of the family dog racing along, a rolling football, a tumbling teddy bear or a snowman on a sledge would be just as entertaining. Position the sliding holes on the board to make sense of the narrative, or not, as you wish, and run the cardboard base through the die cutting machine with dies attached to mark the holes. Use your strong craft knife to cut right through the board with many strokes. If you do not have a die cutting machine, mark and cut slots of your own. The sliding holes do not need to have rounded ends. The slots cut by the dies are just under half an inch, or 5mm wide. Providing the slots are narrower than the coin which will go behind them on the inside of the toy and the card shape which will slide on the outside, they will work. I ended up widening my slots by a couple of millimetres to enhance the slideablity but I would start at 5mm because it is easier to cut cardboard away than stick it back in. However you do it, the actual cutting of the holes will be performed by you with a craft knife and patience. This is the most difficult part of the whole operation, if you can produce cardboard with holes in similar to this:
you can make the toy. I cut identical holes in coloured card for the back and front by drawing through the original holes with a pencil then stuck the three layers together. I wanted the inside to be smooth card too, to enhance the sliding. I coloured the inside edges of the slots using a non-toxic marker pen, became quite artistic on the card fronts, and varnished to finish.
The mechanism consists of a coin on the inside, a card shape on the outside and a tube to connect the two through the sliding hole.
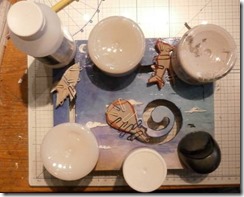
The five ‘dots’ in the photo are rolled up, glued, thin card forming tubes long enough to project on either side of the picture board. Make them thin enough to slide in the hole easily; each will acquire another layer of thin card in the next step. Once the rolls are dry, roll and glue each one in another piece of thin card, cut the spare card that sticks out at the ends of the roll into fringes and splay them out, enabling a coin to stick to one splayed end and a picture to the other.
I cut a circle of card with a hole in the middle to make a card washer. The Tattered Lace penny sliders set has coin covers included but you could make your own by drawing round your coin and making a hole in the middle with a hole punch. Thread the splays through the hole in the card washer and stick them to the washer.
I used red liner tape on the splays. Then stick your coin on top of that, using red liner tape and thick tacky glue or whatever you are using that will set stronger than the will of a two year old having a temper tantrum and similarly top off with an unholed card coin cover.
This is the inner mechanism. Try each one through the slots in the picture front, you may need to make adjustments, widening the slot as required, an emery board works. I found the shapes of the slots affected the free motion, some mechanisms moved in some slots more easily than others, so I determined which were best by trial and error and laid them out marked accordingly.
Now you’re ready for the picture. Cut the original picture out and a piece of chipboard or your thick card the same and a thinner piece of card with a hole punched in it for the splay to poke through.
The thick card will accommodate a small coin, I used a smaller coin than that underneath, the weight of the picture layers balances the larger coin. In the central layer I excavated a hole for the coin to sit in.
I did the same for all the pictures.
I stuck the splay through the hole, made a sandwich with the holed base, the splay, the coin and the thick card and stuck them all together, using paper clips to hold them overnight. As you can see I have coloured the edges of the card that might show in the finished toy.
Are we nearly there yet? Yes we are!
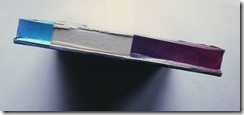
Now we have to make the housing for the mechanisms. To do this turn the board over at this stage and measure to determine the depth of the housing.
I cut a strip of chipboard an inch wide nearly the same length as the toy.
I scored and turned in a quarter inch lip at each side. This leaves a weakness; the board is only joined by a thin sliver. To account for this I cut quarter inch strips of board and glued them in the missing corners.
When the glue is dry stick the walls you have just made all round the back of the toy. I have left a gap at one corner because I have made a toy for a boy with a sister. Sooner or later someone will post something of value, or a baked bean* through the slot on the front and there will be tears before bedtime.
I have glued the walls about quarter of an inch in from the edge, for strength and to make the finishing easier. The neatness of the walls is less important than the strength.
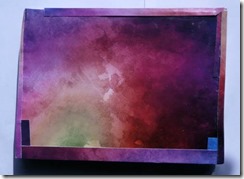
I cut my coloured card to cover: strips to fasten to each quarter inch lip, up the wall and over on to the top and two covers to fit the back.
For strength I glued one back on, turned the box over and weighted it. Once the glue was dry I fitted the edges. This was tricky and required patience. Make sure all the coloured card is stuck, smoothing and pressing as you go, I turned the card into the baked bean release gap and glued it there too.
I went round the corners and glued the main side strip on top.
Glued up the walls on to the back it still doesn’t look neat, but it will once we have glued the second back on, turned it upside down and weighted the whole lot with whatever you can find.
The last job is to remove the paperclips, stick the coloured pictures on the sliders and varnish them.
And play with it.
*Baked beans are valuable as protein, especially if you manage to get them in your mouth. Equally valuable are the address of the suppliers of the items I used,
Tattered Lace and Hunkydory products are also available at www.createandcraft.com


