I apologise before I begin, to seasoned miniaturists, who have built a trillion dolls’ houses from kits. Many readers of JaneLaverick.com are here for a lark and positively encouraged to do so. Therefore if I tell you something you know as well as your blood group (Q peculiar with little spotty bits) there will be someone else for whom this is all news.
Extra extra read all about it, you can build houses from kits.
But only if you follow the steps in the correct order. The thing completely not to do is to rip the packet open and scatter the pieces to the four winds, crying, ‘Oh wow there is a whole house in here – somewhere.’ After which, once you have lost crucial part B4, B4 you know it, there won’t be.
I am attempting two house kits for this series and a furniture kit by the same manufacturer as one of the houses. A furniture kit is a good idea because it’s designed to fit in the house it was made for. At which point a real novice will ask why it isn’t designed to fit in all other houses of the same scale. The manufacturer will probably tell you that it is but the seasoned miniaturist knows that there’s no such thing as scale; would that there were.
In the last 48th scale extravaganza I may have confused you about model railway gauges. The nearest to 48th scale is O gauge which is 1:43 also known as 7mm (to the foot). In America these tend to be actually 1:48 which explains why, when miniaturists got there, they found there were already trackside houses available. The most popular scale in the UK is OO gauge which is 1:76 also known as 4mm. I have used brick cladding from both these scales successfully, I’ll explain how in a moment. There is also HO gauge which is 1:87 or 3.5mm to the foot, N scale which is 1:160 and the brilliant Z gauge which at 1:220 looks wonderful as a working toy railway in a 12th scale dolls’ house. I have always aspired to one of these but, being utterly accurate working model engineering, the prices are a bit extreme.
So you will note that O gauge is really the place we should be heading if we’re intending to purloin model railway bits and pieces and bend them to our will. (You can cackle here a bit, if you’d like.)
However, scale is a moveable feast in dollshousering, a pastime that tends to the artistic side of life rather than the engineering aspect of down time. Moreover house builders who sell their wares like to start with a standard sized sheet of wood and see what they can get out of it. My 100 year old dolls’ house was built by someone who went round an actual Edwardian house, measured it and then simply translated all the feet into inches. If you did the same thing with a modern house, unless you live in a stately home, you’re likely to come out with a much smaller house; houses, like everything except people, have shrunk over the last century. Successful house builders venturing down scale would probably take their best selling dolls’ house and halve all the measurements to arrive at 24th scale and halve those measurements again to arrive at 48th scale. Then they might tinker around with the numbers a bit to make cutting on the band saw a bit easier, or make some alterations to fit the house pieces on to one sheet of wood to make the pricing easy. Then too, buildings are different sizes. A 48th scale model of my garden shed would fit on the palm of your hand and be light as a feather, whereas a 48th scale model of the Empire State Building would be about 3 feet four inches tall and probably break your wrist if you foolishly tried to balance it, shouting, ‘Look what I can do, look, now it’s on one haaaaaaaaaaaa!’
All of which goes to explain why you can use brick cladding and other railway bits in various scales; it all depends on the house and also on the effect you wish to achieve. Last week I told you of my shelf house. I had already covered this with OO gauge plastic brick sheets (well, I think it was, looking, it may have even been a smaller scale) in order to exaggerate the size of the house.
You can see from the side.
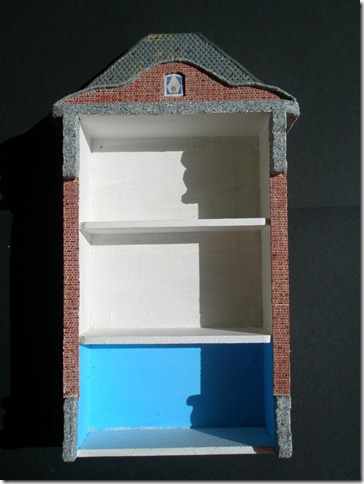
How flipping massive does that look? You almost feel yourself craning your head backwards to peer up at this huge canal side building, don’t you? The reason, of course, is that you know how big a brick should be and you’re extrapolating the size of the building from the information you already have. However, if I show you from the front
you can appreciate that this was originally a seven inch tall spice rack until I added the roof. Even from front view, the scale of the bricks preserve the illusion. So if you’re rummaging round the dump bins in a model shop, don’t go looking any gift horses in the mouth. I will return to the subject of scale in the future. The further down you go in size the greater the percentage error if you merely subdivide things that were not accurately measured to start with, which is why I made this cupboard type baby house. In the 18th century such houses were often created by making ‘just a little one’ of the house and the contents. The net effect is often deeply unrealistic but very charming. Anyone who has studied either my dolls or the films of Walt Disney can see the charm you can infuse if you play around with the proportions. The heads of my dolls have the proportions of children’s heads, even in the adult dolls, which confers on them an innocence which I like. For me the dolls’ house is always the house that belongs to the dolls, never a model of adult reality. So a house built to accommodate the variation will allow you to use nice things that are slightly out of scale, as long as there are a few of them. In 18th century houses, for example, the servant dolls tend to be smaller than the family in residence and the size of important pieces of furniture such as the four poster bed could be exaggerated. Things that have intrinsic value, such as silver items were included regardless of scale because they are valuable. Making a house such as this will give a home to all the mispurchases that looked about right at the dolls’ house fair and also the pieces of furniture you make yourself while you are getting your eye in and the giant polymer clay carrots you create before you learn how to roll them enough but not into oblivion.
Whether you decide to go for all-out realism and start to live your life with a tape measure in your hand or go for a mixture of strictly authentic and ‘too nice not to include’ or a complete artistic impression is absolutely your choice. This is a dolls’ house. You cannot be wrong. If you make it for your pleasure, you are the only person to satisfy. A dolls’ house is an heirloom, doing it your way is the most accurate way of transporting your self and everything you think about life into the future. (Providing you don’t make it out of cake, of course.)
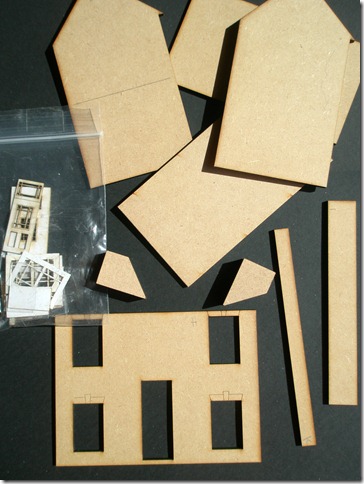
Lets see what you get in the kits. The Petite Properties basic kit has the house walls ready cut out of MDF. The cutting has been done by a laser cutting machine, which is operated co-operatively by the maker, Bea Broadwood and her husband, Tony. The kit comes packaged in a plastic bag with a finger seal top, which is very handy for keeping the bits in, has a further bag inside for the windows, laser cut from card and a printed sheet with instructions and photographs. This isn’t the whole kit because I’d already kitbashed some walls before I thought to photograph it for you.
Bea has marked each piece with a pencil to tell you which part it is. The MDF is smooth, which is nice if you just wanted to paint it but strong enough to take various forms of cladding without collapsing. The one disadvantage of MDF in this scale is that it is too hard to cut well with a craft knife. If you are a ‘make it as it comes’ type, that won’t bother you. I wanted windows on the back wall, and a staircase, neither of which is supplied. I had a go at cutting the back wall but four broken craft knives later, decided to replace the wall with something I could cut easily.
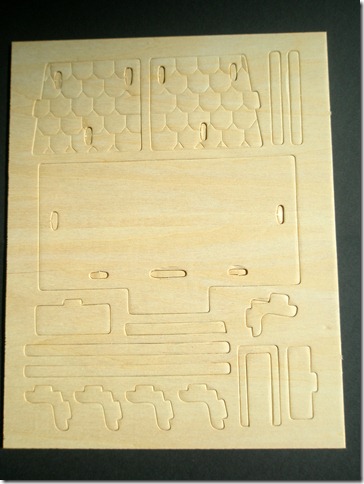
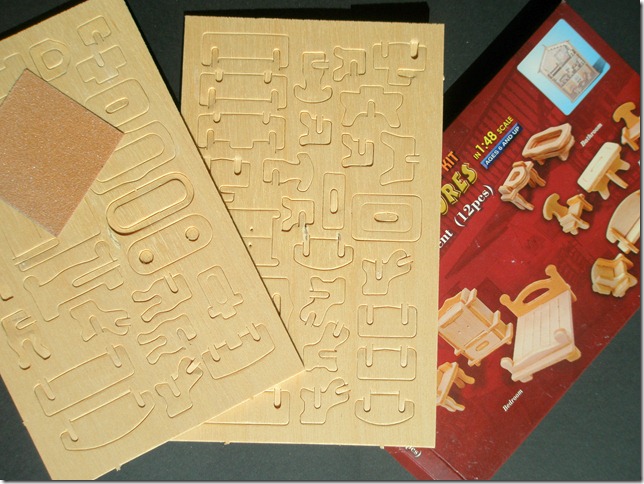
The Woodcraft kit has been die stamped out of plywood.
This method of producing dolls’ house kits is common in America, even in twelfth scale. I would have to say, in any scale, that the pleasure that can be derived from making the kit has a great deal to do with the quality of the plywood. I have struggled with kits that have been five splinters per one piece removed and also been frustrated by cheap ply with disintegrating middle sections, dry ply that drank all the glue and still fell to bits and inadequately die stamped pieces that pushed out destroying the piece next to them or were so strong they nearly broke your thumbs.
This wood looks good. It’s smooth, it’s light in colour and has no noticeable ‘feathers’ or splinters.
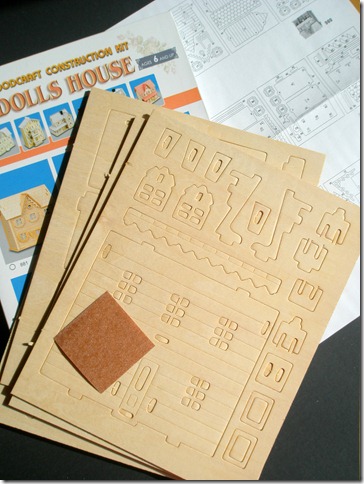
The kit contains
Four die stamped sheets of wood, the box with an illustration on the front (never underestimate the usefulness of a picture showing you what you’re aiming for) a sheet of paper with all the part numbers on for all the kits in this series and a miniature sheet of sandpaper. The sandpaper is not very useful, you would do much better with a pack of emery boards, they are stiff and thin enough to get into the little corners and, unlike your giant fingers, won’t accidentally sand pieces round that are meant to be square.
Would you like a look at the matching furniture kit?
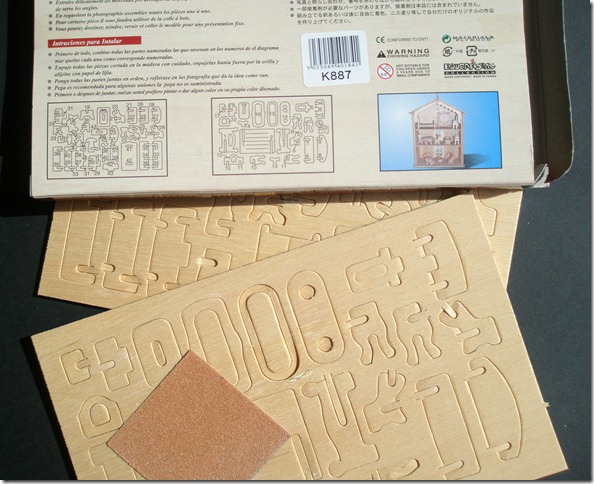
A similar idea, however, beware, the instructions are not on a sheet of paper but printed, quite small on the back of the packet.
That’s them in the two tiny boxes next to the picture of the furniture in the house. There are no instructions as such, you really do have to follow the picture on the front of the box.
The first thing to do is orient the stamped out wood sheets to the same direction as the numbered instructions and then transfer the numbers to the wood by writing on them with a pencil. Make sure you get the wood sheets the same way up as the pictures, take your time and do not punch anything out at all until every single piece of wood is numbered. Even then don’t punch them all out at once and do not let anyone who is ‘helping’ you, do it either. Just locate number one, check what you have to do with it and then ease it out cautiously with a craft knife to help, sand off any feathers and put it on the nice empty tray, returning the rest to the ‘not done these yet tray’. That way, when someone comes to the door (and they will, almost as soon as you get started) you won’t end up losing your place and going all to pieces, or even, losing your pieces and not being able to build your place at all.
Next time we’ll be kitbashing a back wall, see you then.
hohohohohohohohohohohoohohohohhohhohohoohhohhohohoohohohhoohohoohohohouse
JaneLaverick.com – building.


