")
I’ve been sculpting some small animals and a doll in paper clay. I thought you might like to have a go too. When I began doll making over thirty years ago (I know – where does the time go?) it was considered too difficult for normal people to sculpt. In fact the first modern doll moulds were made in the 1960s, when domestic kilns became available, by taking antique dolls apart and taking moulds from the pieces.
Using an item already made to take moulds from is, in fact, illegal. Any shape that has been made by a person to sell, or reproduce and sell, is copyrighted just by being made. When you think about it, this is how the sculptors make their living, whether it is a Disney Snow White figure, a brass part for an aeroplane or a new kitchen spatula, someone had to make the original shape and was paid to do so. It’s their job, so you cannot simply take a mould from it and make another, you’d be in breach of copyright and if you sold the result you could be sued. This has actually happened in the miniature world before. It’s not even safe if the person who, for example, invented the character in a story, that caused films and models and toys, has long since died, as their descendants will have inherited the copyright. At this point would-be sculptors and doll makers usually make a wailing noise and storm off in a sulk, thinking it’s too difficult and they’d better take up an alternative career as a recycling colleague or horizontal temporary storage facility re-stacker in a supermarket.
But there is no need to go off in a strop, sculpture is something anyone can learn who has two useable hands and eyes. Though I did once encounter a couple making miniatures who had one hand each, the minis were good and the couple were even better.
I never had a formal lesson, there may be better ways of doing it but this is my way and it is easy.
To begin, assemble supplies.
You will need:
Air drying paper clay. There are many brands on the market, look for one which is less like paper and more like clay. To make a mould from your sculpture you need one that dries quite hard. Any that are described as ‘super light’ usually have air incorporated and do not dry firmly enough to take a mould from. The brand I use is Creative Paperclay modelling material in a 16 ounce pack in a black wrapper. This has been going for years, is stocked by the big river retailer and lasts years opened as long as you keep it in a very sealed bag. Mine is in a bag with a rubber band round it, because, as it dries in the air, you need to exclude air in storage. I hadn’t used it for a couple of years, got it out again and it was good to go. Looking at it, I see it is made by the Creative Paperclay co. in Camarillo. If you cannot get this, if you are shopping online, ask for one that dries hard and behaves like clay.
Tools. I am making in small scale, as you can see by the photo of the animals by the pen. The size is not important but you do need the right tools. In the size I work, my best friend is my disposable scalpel, it has a tiny sharp tip. If you are working on a sculpture, the finished size of which is about the size of your hand, you may only need your hand as the tool. You can get plastic sculpting tools which will help make the shapes. In small size, cocktail sticks, also known as toothpicks, are helpful and anything else small and hard that will make a mark, or has a flat surface to smooth, and will not disintegrate in water, which is used for smoothing the surface of the model. If you are reluctant to buy tools until you see if you are any good, I’d suggest assembling a metal tail comb, toothpicks, paint brush handles and your smallest old knife, doesn’t have to be sharp, an old butter knife will be fine, and a craft knife will be better because of the fine tip.
Water in a jam jar.
For the moulds I am using Siligum Gede, Pebeo Silicone two part moulding material. This is another item that has been going for years and keeps for years. You can get it in two sizes, the largest, which might make about eight to ten small animal moulds is £22 about, currently where I am. There is a smaller pack that might make about five small moulds at a lesser price. There are other two part silicone mould making materials, the Pebeo one has the advantage of being widely available, mine was the big river retailer again, but most craft stores will be aware of the brand Pebeo. The Pebeo moulding material is fast and I do mean fast. You can make a mould in five minutes. This is ideal if you are going to be Bernini in a rush, or need to be Henry Moore by tomorrow. It is also good because if the first effort is awful, you’ll have time to sleep on it and have another quick go in the morning.
The only other thing you need is a surface to work on. Non stick would really help. I’m using waxed paper waste from sticky-backed craft sheets. A non-stick mat, an old baking tray or even just a bit of newspaper will do but non-stick helps you more, because the model you are making, while it is wet, doesn’t stick to the surface every time you put it down.
Let’s begin.
I am going to model a small sitting animal, because I think that’s something most people would like to have a go at. I am saying ‘animal’ deliberately because, having got the basic shape, you could tweak it to be a dog, a cat, a fox, a bear, a mouse, whatever you can think of that has four legs and sits on its bottom. The reason for choosing this shape is that a model is easier to display with a good base that sits firmly and a paper clay shape is easier to make in a mould and demould if it is basically a cone.
Proportions are interesting. In an adult human the shape of someone standing upright can be divided into seven equal measures, with the head occupying the top space. For children we need five spaces with the head in the top space. The majority of mammals have young whose heads are proportionally larger in relation to the rest of their bodies, than adults. As we are mammals and need to feed and protect our young, we do not find the giant head scenario at all horrifying, we find it cute. For this reason I have proportioned the animal as a young one, you will love it even if it’s a really awful sculpture, much as you do the goofy kid in the striped tee-shirt with the huge eyeglasses and the ripped jeans.
")
Break a bit of paper clay off the block about this big and roll it in a ball.
")
and another one this big in comparison.
")
Use your flattening tool, butter knife, or whatever dipped into water to shape the larger ball into a pyramid type shape with a flat base.
")
Use the modelling tool to push a pointy hollow in the front of the clay. This will form the front legs of the sitting-up animal.

Use the knife to lever up (gently) two front legs.
")
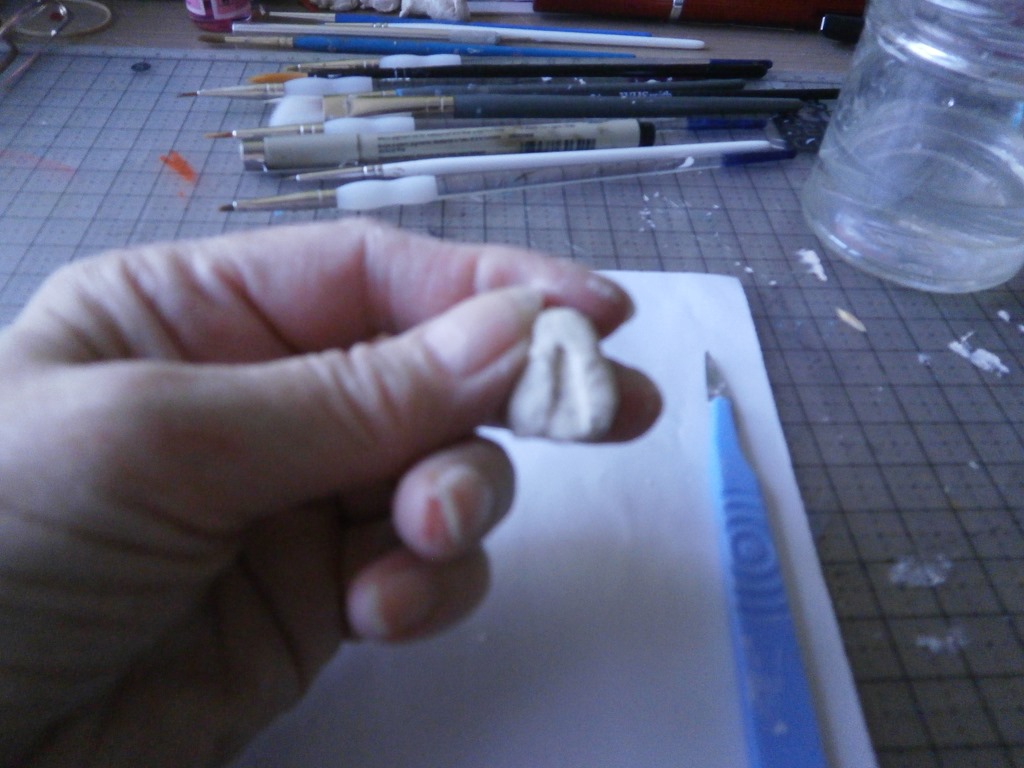
Use the point of your tool to make a depression in the side that suggests where the stomach of the animal would be and shape the back leg that the animal is sitting on. It does not have to be perfect yet, we are aiming for ‘looks a bit like, in the right sort of size’. If you have done a giant back leg or one hefty front leg and one weedy one this is the time to correct the shape. You can remove clay with the tip of your knife and smooth some more to make both legs thin, or add a tiny bit of clay and smooth it in with water to make both legs fat. Keep going until the back legs are roughly the same size and shape and the front legs are too.
Turn the front ‘paws’ out a little and shape them with a wetted knife. I have made one front leg slightly raised but make sure at least one is touching the ground, so the finished model will not fall over.
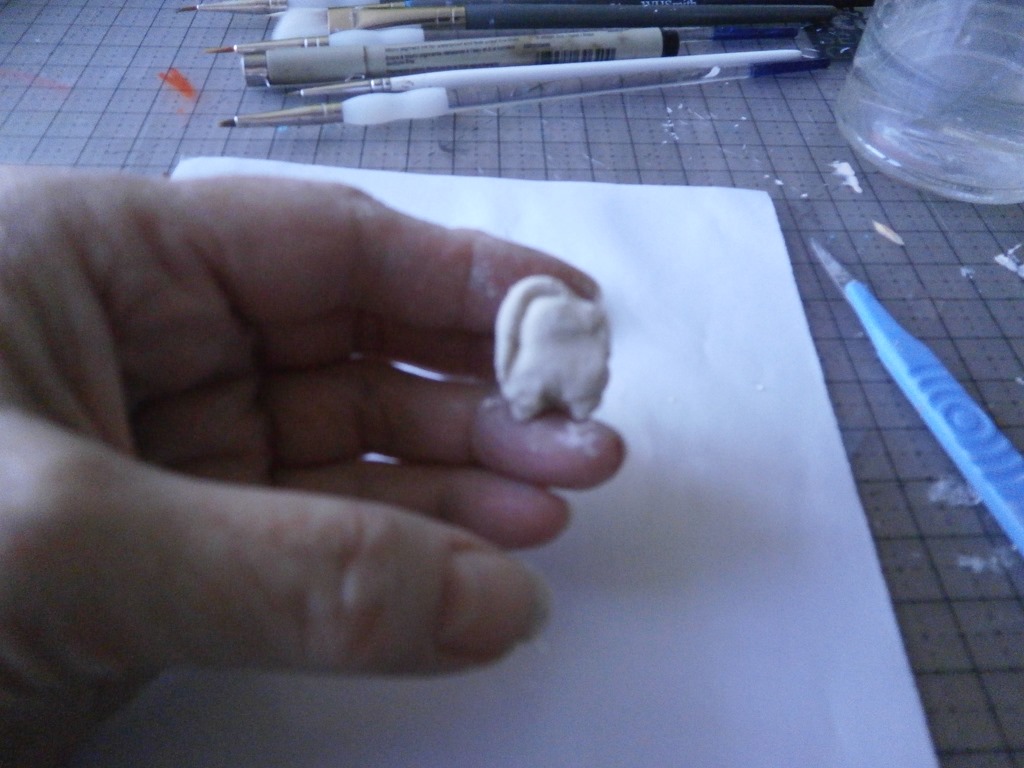
Now make a tail by pulling a tiny bit of clay off the block and rolling it, either between your hands, with one finger across the wax paper or with a tool.
")
This sort of size, in comparison to the body. Now stick it round the body, attaching the base of the tail by pressing with your modelling tool and using the tip of the knife to smooth it round the body. Keep smoothing, using water where appropriate until it is securely attached. Smooth the base of the animal to incorporate the tail into the base from below.
")
Keep going until it is attached and incorporated. Don’t forget that the paper clay you demould, when you have made the mould, can be reworked to separate the tail. We are trying to make as cohesive a shape as possible to make the mould making successful.
In sculpting the easiest shape to make a mould from, similar to an animal or human, would be a cone shape. Anything sticking out is in peril of being pulled off when you demould the shape, taking it out of the mould. If you think about a cone going into a mould point first and coming out by pulling the base, success is almost guaranteed. However, adding bits that stick out, causes problems. One of the most typical is a chin. A chin on a person, is what in sculpting terms, is known as an undercut. It doesn’t only stick out, it juts down. For this reason we will try to make our simple sitting animal as cone-like as possible. It is discouraging to make a sculpture so good, you are considering permitting your local national gallery to showcase it to enhance their reputation, only to find, when you’ve made the mould, so they can sell them by the hundreds and make your fortune, that every time you take the shape out of the mould you pull the ears or half the face off. This may well be the wellspring of ‘modern’ art but we want no truck with that. We have ambition. We’re going to try to make it look like what it’s meant to be.
I am going to break off now because the publishing programme will only support a small number of pictures. So if you are reading this and nothing follows, just wait, part two which describes modelling and attaching the head, will follow as soon as I’ve written it.
However, it might be time, if you have got this far, to allow yourself a smirk. You are actually sculpting. Yes, you are. Michelangelo, Rodin, me, you. Oh yes. Sculptors, us lot. Fame awaits, just as soon as I’ve written part two and told you how to put the head on. Meanwhile, just regard it as a body of work.
Back soon.
#################################